腾讯云OCR API使用教程 本教程介绍腾讯云OCR API的使用方法,包括Java、.NET、C++、Node.js、Python、GO六种编程语言的调用方式,从环境配置到案例实现,每种语言都配备了示例代码和可直接运行的Demo以方便使用。
您可以从以下仓库中下载示例代码:https://github.com/ShengjieJin/tencentcloudOCRDemo
准备工作 在开始使用腾讯云OCR API之前,您需要先进行以下准备工作:
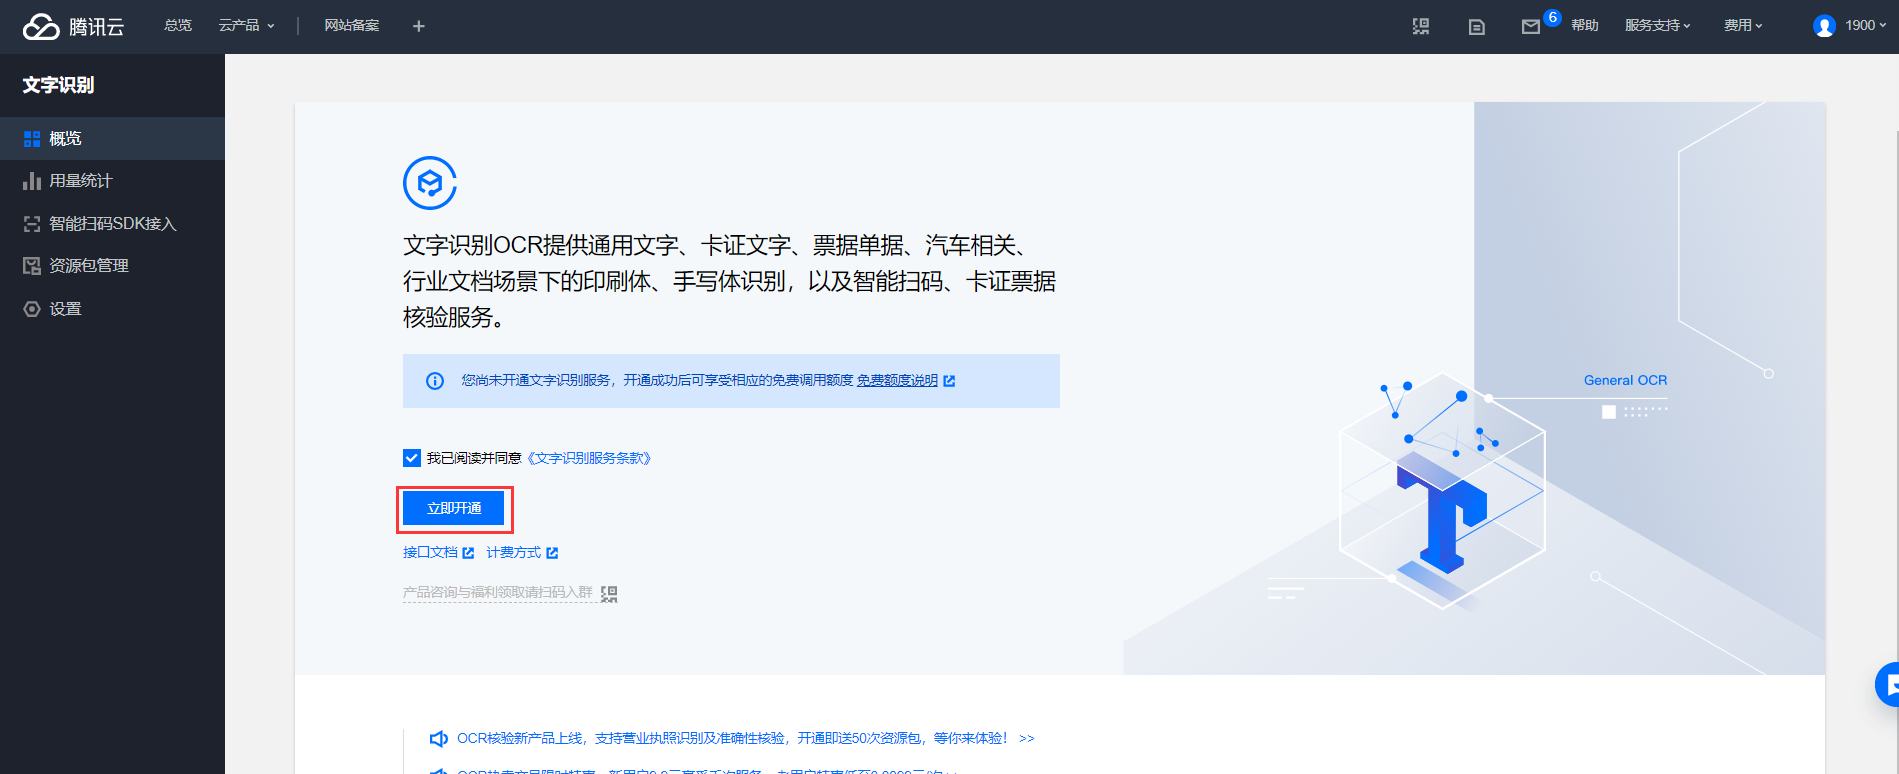
开通文字识别服务: 进入 文字识别控制台 ,注册腾讯云账号并通过实名认证,阅读《文字识别服务条款》后勾选同意并单击立即开通;
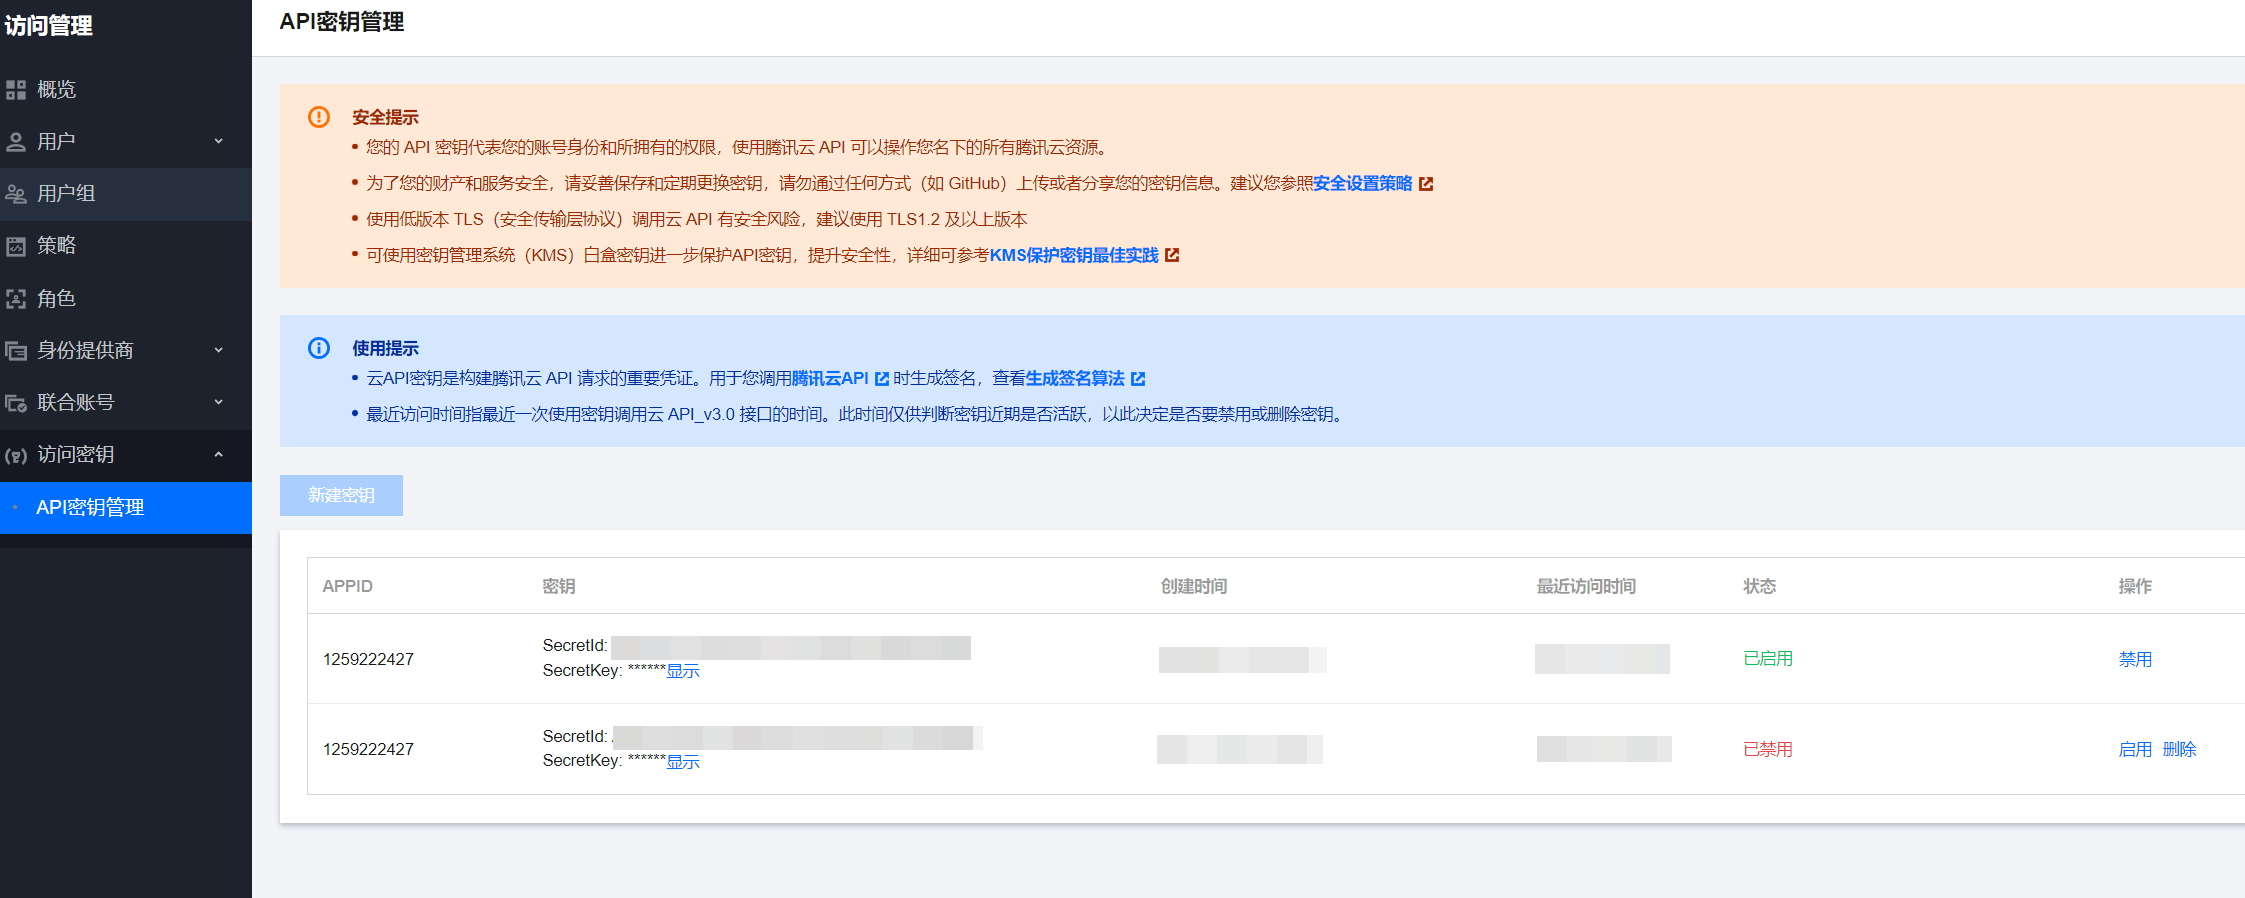
获取个人密钥: 单击 查看密钥 ,进入控制台的 API 密钥管理界面,可查看您的个人密钥 ,若是新用户可单击【新建密钥】按钮创建个人密钥 。
开发环境准备: 下载安装各自编程语言的开发环境,如Java、.NET、C++、Node.js、Python、GO等,六种选其一。
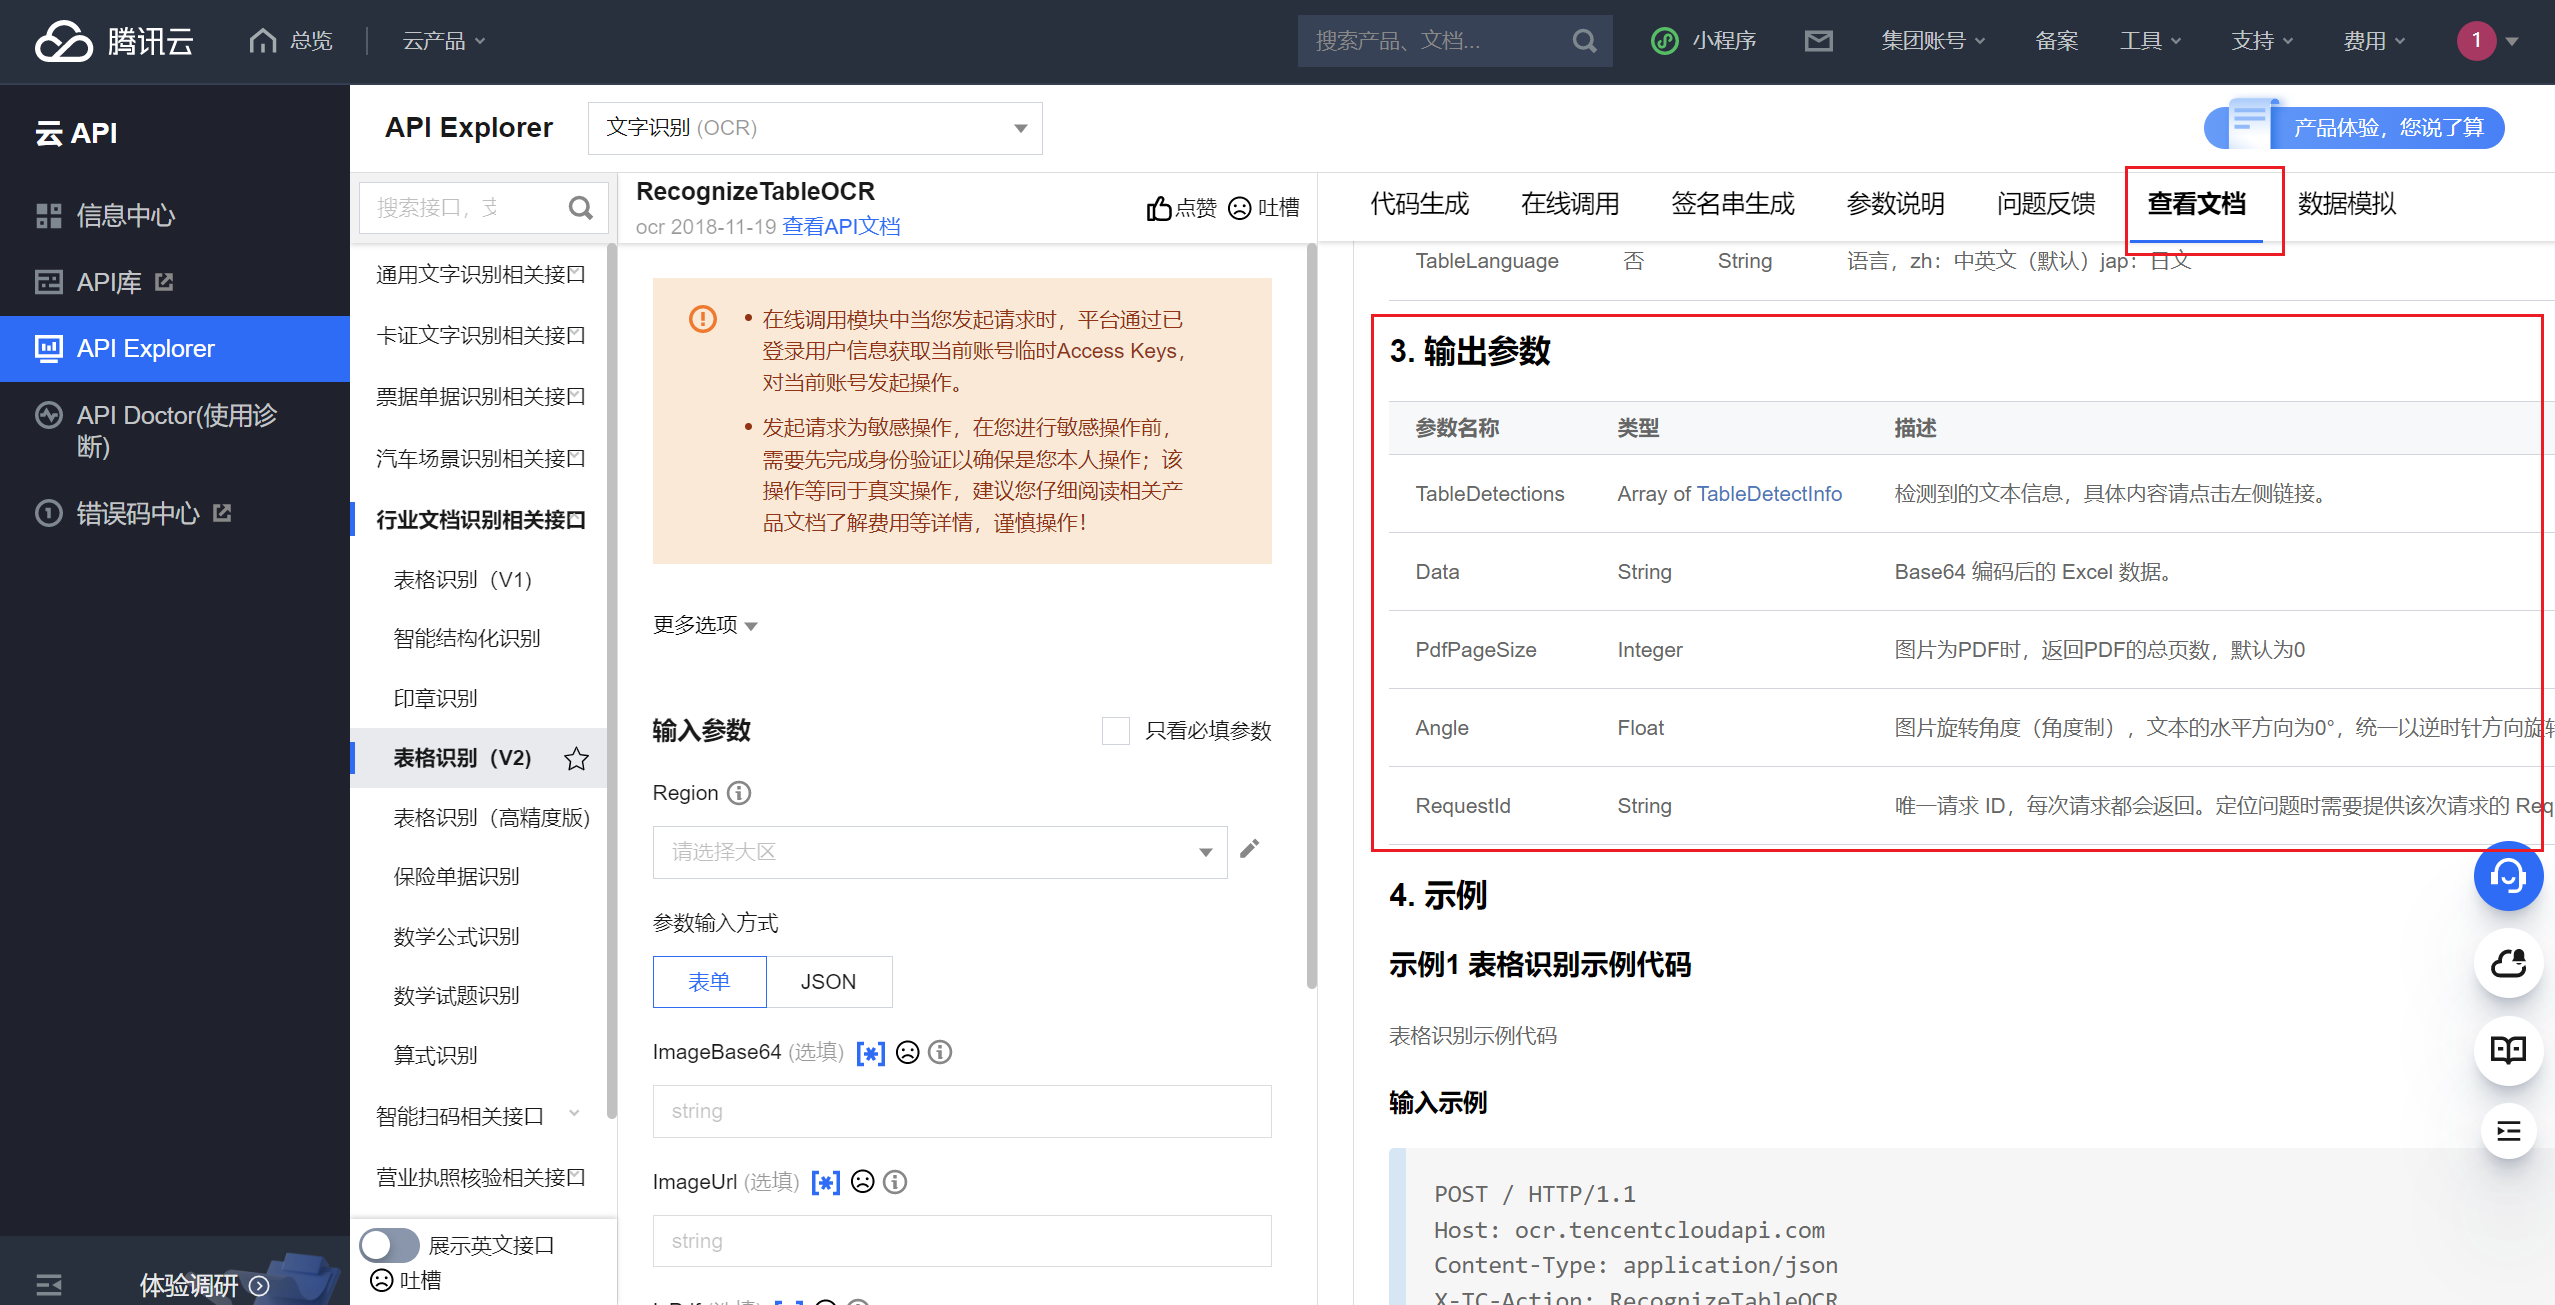
了解输出格式: 您可以参考腾讯云 API Explorer
Java调用OCR API 步骤1:环境配置
JDK 7版本及以上。
安装SDK(以下二选一 ):
步骤2:身份认证 在 Java 代码中使用 OCR API 前,需要进行身份认证,即在代码中设置 SecretId 和 SecretKey。
1 2 3 4 5 6 7 8 9 10 11 12 13 14 15 16 17 18 19 20 21 import com.tencentcloudapi.common.Credential;import com.tencentcloudapi.ocr.v20181119.OcrClient;import com.tencentcloudapi.ocr.v20181119.models.*;public class RecognizeTableOCR {public static void main (String[] args) {Credential cred = new Credential ("secretId" , "secretKey" );HttpProfile httpProfile = new HttpProfile ();"ocr.tencentcloudapi.com" );ClientProfile clientProfile = new ClientProfile ();OcrClient client = new OcrClient (cred, "ap-guangzhou" , clientProfile);
步骤3:Base64编码 OCR API 要求将图片转换为 Base64 编码的字符串格式。在 Java 代码中,可以使用以下方式将图片转换为 Base64 编码的字符串:
1 2 3 4 5 6 7 8 9 10 11 12 13 14 15 16 17 18 import java.io.*;import java.util.Base64;public class RecognizeTableOCR {public static void main (String[] args) {File file = new File ("path/to/image.jpg" );InputStream inputStream = new FileInputStream (file);byte [] buffer = new byte [(int ) file.length()];String imageBase64 = Base64.getEncoder().encodeToString(buffer);
步骤4:调用API 将图片转换为 Base64 编码的字符串后,即可调用 OCR API 进行文字识别。
1
2
3
4
5
6
7
8
9
10
11
12
13
14
15
16
17
18
19
20
21
import com.tencentcloudapi.common.profile.ClientProfile;import com.tencentcloudapi.common.profile.HttpProfile;import com.tencentcloudapi.common.exception.TencentCloudSDKException;public class RecognizeTableOCR {public static void main (String [] args) {try {RecognizeTableOCRRequest req = new RecognizeTableOCRRequest ();RecognizeTableOCRResponse resp = client.RecognizeTableOCR(req);catch (TencentCloudSDKException | IOException e) {
完整示例 以下是一个完整的示例,演示了如何使用 Java调用腾讯云的 OCR 服务来识别表格,并打印出识别结果。
1 2 3 4 5 6 7 8 9 10 11 12 13 14 15 16 17 18 19 20 21 22 23 24 25 26 27 28 29 30 31 32 33 34 35 36 37 38 39 40 41 42 43 44 45 46 47 package org.example;import java.io.*;import java.util.Base64;import com.tencentcloudapi.common.Credential;import com.tencentcloudapi.common.profile.ClientProfile;import com.tencentcloudapi.common.profile.HttpProfile;import com.tencentcloudapi.common.exception.TencentCloudSDKException;import com.tencentcloudapi.ocr.v20181119.OcrClient;import com.tencentcloudapi.ocr.v20181119.models.*;public class RecognizeTableOCR {public static void main (String [] args) {try {String imagePath = "src/main/resources/images/1.jpg" ;File file = new File (imagePath);InputStream inputStream = new FileInputStream (file);byte [] buffer = new byte [(int ) file.length()];String imageBase64 = Base64.getEncoder().encodeToString(buffer);Credential cred = new Credential ("secretId" , "secretKey" );HttpProfile httpProfile = new HttpProfile ();"ocr.tencentcloudapi.com" );ClientProfile clientProfile = new ClientProfile ();OcrClient client = new OcrClient (cred, "ap-guangzhou" , clientProfile);RecognizeTableOCRRequest req = new RecognizeTableOCRRequest ();RecognizeTableOCRResponse resp = client.RecognizeTableOCR(req);catch (TencentCloudSDKException | IOException e) {
具体案例 您可以从以下仓库中下载示例代码:https://github.com/ShengjieJin/tencentcloudOCRDemo
路径:/Demo/1 Java Demo 中提供了可直接运行的程序。
项目架构如下所示:
1 2 3 4 5 6 7 8 9 10 11 12 13 14 15 16 17 1 Java Demo-- pom.xml `-- src |-- main | |-- java | | `-- com | | `-- example | | `-- RecognizeTableOCR.java | `-- resources | `-- images | `-- 1.jpg | 2.jpg `-- test |-- java | `-- com | `-- example `-- resources
配置好相关SDK和Maven环境后,将RecognizeTableOCR.java第27行中的 "SecretId", "SecretKey" 替换为您自己的凭证。
1 Credential cred = new Credential ("secretId" , "secretKey" );
在路径:/Demo/1 Java Demo下打开命令行,执行以下命令带依赖地编译程序:
1 mvn compile assembly:single
运行程序:
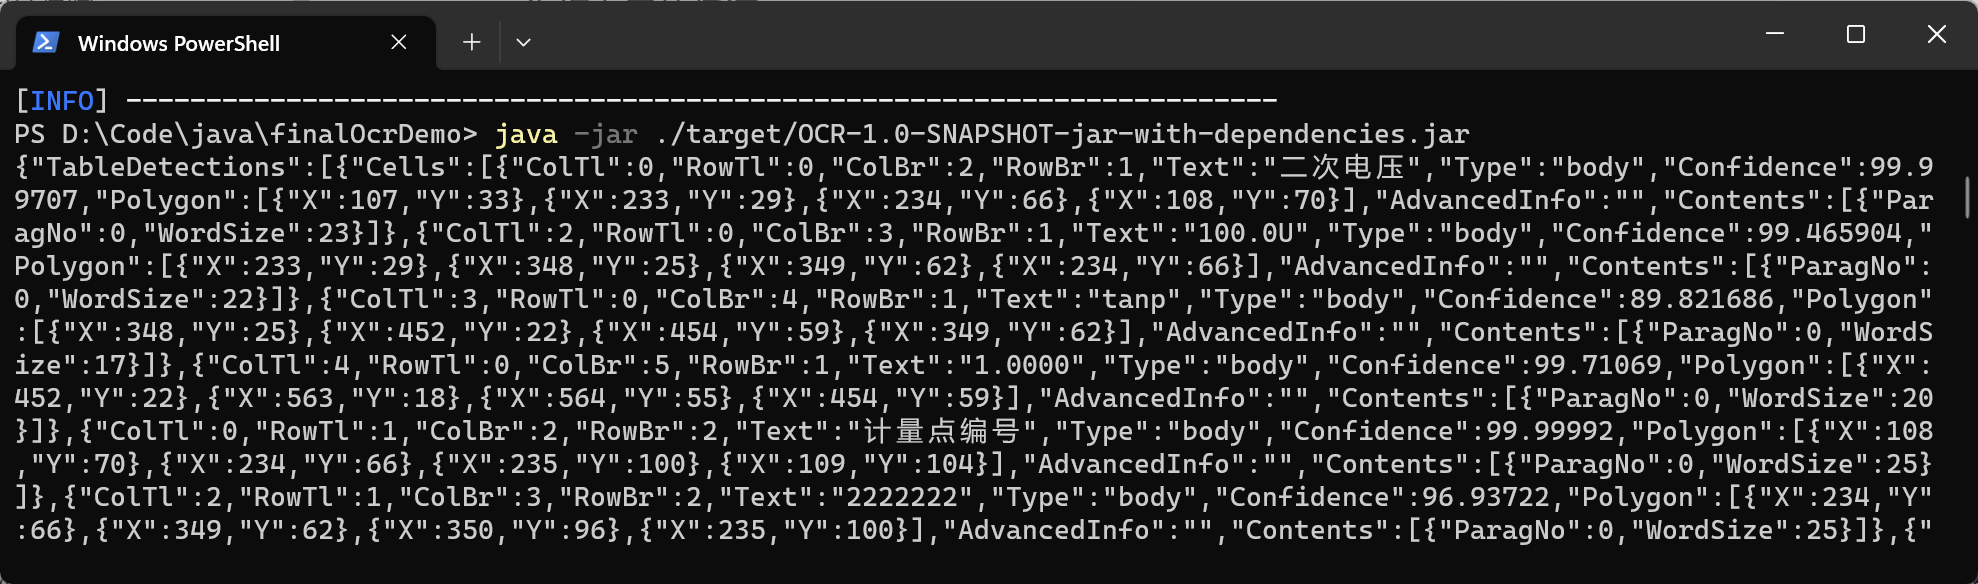
1 java -jar ./target/OCR-1.0-SNAPSHOT-jar-with-dependencies.jar
程序运行后,变量 resp 中将保存 API 返回的 JSON 格式字符串。下面是打印内容的示例:
.Net调用OCR API 步骤1:环境配置
安装.NET Framework 4.5+ 或者 .NET Core 2.1;
创建一个ocr项目,并进入项目内:
1 2 dotnet new console -o ocrcd ./ocr
通过 nuget 安装SDK:
1 dotnet add package TencentCloudSDK.Ocr
步骤2:身份认证 在此步骤中,我们将配置身份认证凭证。请确保已获取您的腾讯云 API 密钥。
1 2 3 4 5 6 Credential cred = new Credential"SecretId" ,"SecretKey"
在以上代码中,您需要将SecretId和SecretKey替换为您的实际API密钥信息。
步骤3:Base64编码 将待识别的图片转换为Base64编码格式,并将编码后的字符串赋值给请求对象。
1 2 3 4 5 byte [] imgBytes = File.ReadAllBytes("./images/1.jpg" );string imgBase64 = Convert.ToBase64String(imgBytes);
步骤4:调用API 在身份认证和Base64编码后,即可调用API并获取响应结果。
1 2 3 4 5 6 7 8 9 10 11 12 new OcrClient(cred, "ap-guangzhou" , clientProfile);new RecognizeTableOCRRequest();byte [] imgBytes = File.ReadAllBytes("./images/1.jpg" );string imgBase64 = Convert.ToBase64String(imgBytes);
完整示例 以下是一个完整的示例,演示了如何使用 .Net 调用腾讯云的 OCR 服务来识别表格,并打印出识别结果。
1 2 3 4 5 6 7 8 9 10 11 12 13 14 15 16 17 18 19 20 21 22 23 24 25 26 27 28 29 30 31 32 33 34 35 36 37 38 39 40 41 42 43 44 45 46 47 48 using System;using System.Threading.Tasks;using TencentCloud.Common;using TencentCloud.Common.Profile;using TencentCloud.Ocr.V20181119;using TencentCloud.Ocr.V20181119.Models;namespace TencentCloudExamples class RecognizeTableOCR static void Main (string [] argstry new Credential {"SecretId" ,"SecretKey" new ClientProfile();new HttpProfile();"ocr.tencentcloudapi.com" );new OcrClient(cred, "ap-guangzhou" , clientProfile);new RecognizeTableOCRRequest();byte [] imgBytes = File.ReadAllBytes("./images/1.jpg" );string imgBase64 = Convert.ToBase64String(imgBytes);catch (Exception e)
具体案例 您可以从以下仓库中下载示例代码:https://github.com/ShengjieJin/tencentcloudOCRDemo
路径:/Demo/2 .Net Demo 中提供了程序代码,但不能直接运行。
按照步骤1配置好相关环境后,拷贝``/Demo/2 .Net Demo下的images和Program.cs`到ocr项目中:
将Program.cs第18、19行中的 "SecretId","SecretKey" 替换为您自己的凭证。
1 2 3 4 Credential cred = new Credential {"SecretId" ,"SecretKey"
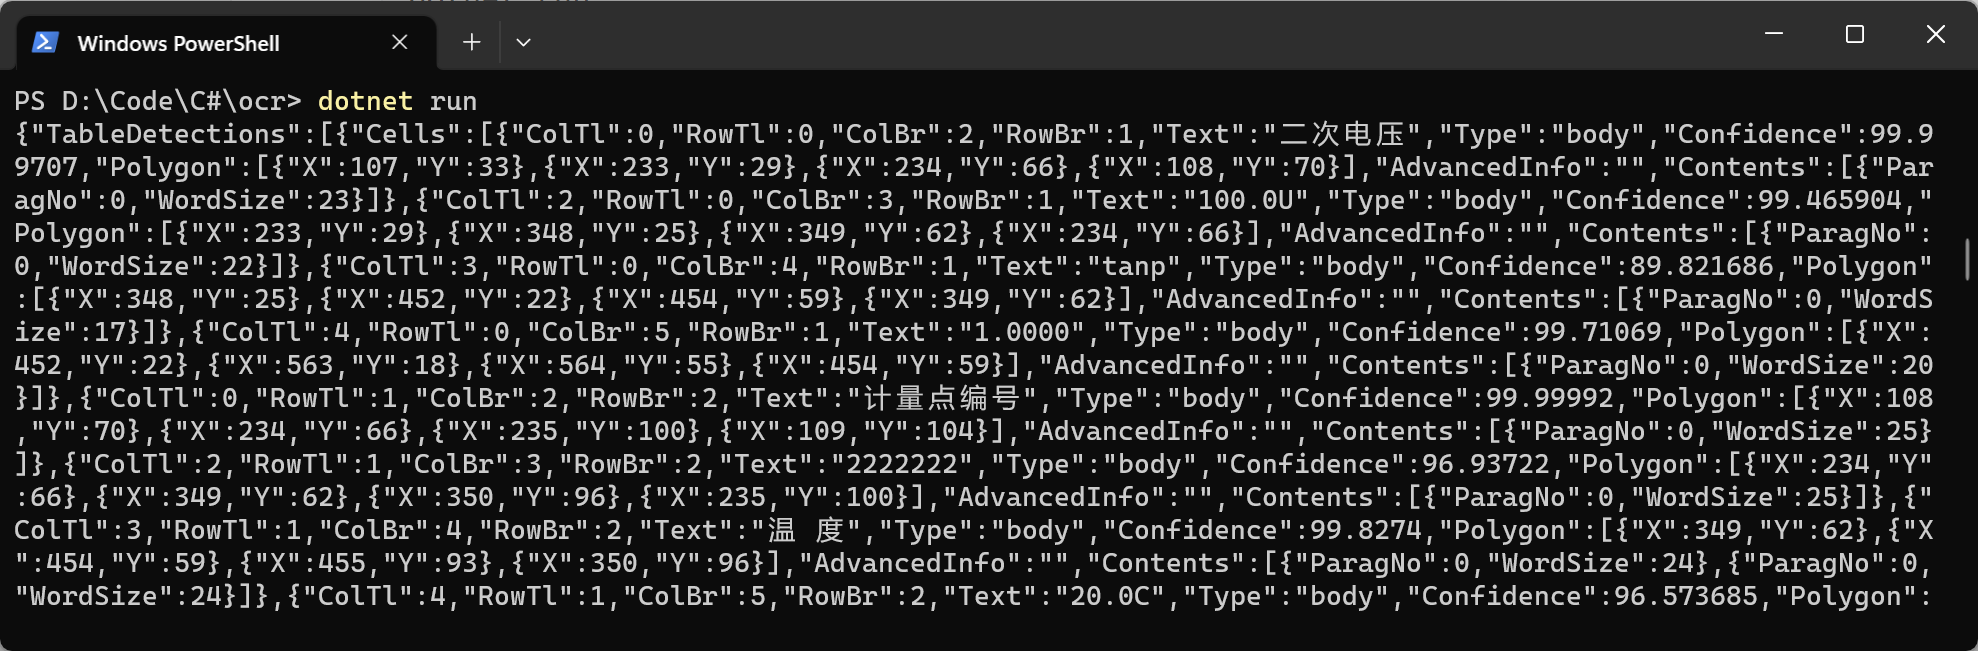
执行以下命令运行程序:
程序运行后,变量 response 中将保存 API 返回的 JSON 格式字符串。下面是打印内容的示例:
C++调用OCR API 步骤1:环境配置 (仅支持Linux环境)
运行 sudo apt-get update 命令更新软件包列表
运行 sudo apt-get upgrade 命令更新系统中已安装软件包的版本。
运行sudo apt install git命令安装git
安装 cmake 编译工具:
ubuntu:sudo apt-get install cmake
centos:yum install cmake3
安装依赖库 libcurl:
ubuntu:sudo apt-get install libcurl4-openssl-dev
centos:yum install libcurl-devel
安装依赖库 openssl:
ubuntu:sudo apt-get install libssl-dev
centos:yum install openssl-devel
安装依赖库 libuuid:
ubuntu:sudo apt-get install uuid-dev
centos:yum install libuuid-devel
从源代码构建 SDK:
1 2 3 4 5 6 7 8 9 git clone https://github.com/TencentCloud/tencentcloud-sdk-cppcd tencentcloud-sdk-cppmkdir sdk_buildcd sdk_build"ocr" ..
步骤2:身份认证 在此步骤中,我们将配置身份认证凭证。请确保已获取您的腾讯云 API 密钥。
1 Credential cred = Credential ("Your SecretId" , "Your SecretKey" );
在以上代码中,您需要将yourSecretId和yourSecretKey替换为您的实际API密钥信息。
步骤3:Base64编码 OCR API 接受 Base64 编码后的图像数据作为输入,因此需要将本地图片数据转换成 Base64 编码。这里提供了一个简单的 C++ 函数 base64_encode 来进行 Base64 编码。
1 2 3 4 5 6 7 8 9 10 11 12 13 14 15 16 17 18 19 20 21 22 23 24 25 26 27 28 29 30 31 32 33 34 35 36 37 38 39 40 41 42 43 44 45 46 47 static const std::string base64_chars ="ABCDEFGHIJKLMNOPQRSTUVWXYZ" "abcdefghijklmnopqrstuvwxyz" "0123456789+/" ;static inline bool is_base64 (unsigned char c) return (isalnum (c) || (c == '+' ) || (c == '/' ));std::string base64_encode (unsigned char const * bytes_to_encode, unsigned int in_len) {int i = 0 ;int j = 0 ;unsigned char char_array_3[3 ];unsigned char char_array_4[4 ];while (in_len--) {if (i == 3 ) {0 ] = (char_array_3[0 ] & 0xfc ) >> 2 ;1 ] = ((char_array_3[0 ] & 0x03 ) << 4 ) + ((char_array_3[1 ] & 0xf0 ) >> 4 );2 ] = ((char_array_3[1 ] & 0x0f ) << 2 ) + ((char_array_3[2 ] & 0xc0 ) >> 6 );3 ] = char_array_3[2 ] & 0x3f ;for (i = 0 ; (i < 4 ); i++)0 ;if (i) {for (j = i; j < 3 ; j++)'\0' ;0 ] = (char_array_3[0 ] & 0xfc ) >> 2 ;1 ] = ((char_array_3[0 ] & 0x03 ) << 4 ) + ((char_array_3[1 ] & 0xf0 ) >> 4 );2 ] = ((char_array_3[1 ] & 0x0f ) << 2 ) + ((char_array_3[2 ] & 0xc0 ) >> 6 );for (j = 0 ; (j < i + 1 ); j++)while ((i++ < 3 ))'=' ;return ret;
调用该函数对图片进行编码
1 2 3 4 5 6 7 8 9 "./images/1.jpg" ;ifstream in (image_path, ios::in | ios::binary) ;rdbuf ();str ();base64_encode (reinterpret_cast <const unsigned char *>(image_binary.data ()), image_binary.size ());
步骤4:调用API 调用API的过程需按照以下步骤:
实例化http选项、client选项、client对象、请求对象,每个接口都会对应一个request对象。
1 2 3 4 5 6 7 8 9 10 11 12 13 HttpProfile ();SetEndpoint ("ocr.tencentcloudapi.com" );ClientProfile ();SetHttpProfile (httpProfile);OcrClient (cred, "ap-guangzhou" , clientProfile);RecognizeTableOCRRequest ();
填充请求对象的参数,如图片数据等。
1 2 SetImageBase64 (image_base64);
调用client对象的接口,并传入请求对象,使用腾讯云的RecognizeTableOCR接口来识别表格图片。
1 2 auto outcome = client.RecognizeTableOCR (req);
处理返回结果。
1 2 3 4 5 6 7 8 if (!outcome.IsSuccess ())GetError ().PrintAll () << endl;return -1 ;GetResult ();ToJsonString () << endl;
完整示例 下面是一个完整的示例程序,它将读取本地的一张表格图片,并调用腾讯云的RecognizeTableOCR接口来识别表格。具体的代码如下:
1 2 3 4 5 6 7 8 9 10 11 12 13 14 15 16 17 18 19 20 21 22 23 24 25 26 27 28 29 30 31 32 33 34 35 36 37 38 39 40 41 42 43 44 45 46 47 48 49 50 51 52 53 54 55 56 57 58 59 60 61 62 63 64 65 66 67 68 69 70 71 72 73 74 75 76 77 78 79 80 81 82 83 84 85 86 87 88 89 90 91 92 93 94 95 96 97 98 99 100 101 102 103 104 105 106 107 108 109 110 111 112 #include <tencentcloud/core/Credential.h> #include <tencentcloud/core/profile/ClientProfile.h> #include <tencentcloud/core/profile/HttpProfile.h> #include <tencentcloud/ocr/v20181119/OcrClient.h> #include <tencentcloud/ocr/v20181119/model/RecognizeTableOCRRequest.h> #include <tencentcloud/ocr/v20181119/model/RecognizeTableOCRResponse.h> #include <iostream> #include <string> #include <vector> #include <fstream> using namespace TencentCloud;using namespace TencentCloud::Ocr::V20181119;using namespace TencentCloud::Ocr::V20181119::Model;using namespace std;static const std::string base64_chars ="ABCDEFGHIJKLMNOPQRSTUVWXYZ" "abcdefghijklmnopqrstuvwxyz" "0123456789+/" ;static inline bool is_base64 (unsigned char c) return (isalnum (c) || (c == '+' ) || (c == '/' ));std::string base64_encode (unsigned char const * bytes_to_encode, unsigned int in_len) {int i = 0 ;int j = 0 ;unsigned char char_array_3[3 ];unsigned char char_array_4[4 ];while (in_len--) {if (i == 3 ) {0 ] = (char_array_3[0 ] & 0xfc ) >> 2 ;1 ] = ((char_array_3[0 ] & 0x03 ) << 4 ) + ((char_array_3[1 ] & 0xf0 ) >> 4 );2 ] = ((char_array_3[1 ] & 0x0f ) << 2 ) + ((char_array_3[2 ] & 0xc0 ) >> 6 );3 ] = char_array_3[2 ] & 0x3f ;for (i = 0 ; (i < 4 ); i++)0 ;if (i) {for (j = i; j < 3 ; j++)'\0' ;0 ] = (char_array_3[0 ] & 0xfc ) >> 2 ;1 ] = ((char_array_3[0 ] & 0x03 ) << 4 ) + ((char_array_3[1 ] & 0xf0 ) >> 4 );2 ] = ((char_array_3[1 ] & 0x0f ) << 2 ) + ((char_array_3[2 ] & 0xc0 ) >> 6 );for (j = 0 ; (j < i + 1 ); j++)while ((i++ < 3 ))'=' ;return ret;int main () Credential ("AKIDfM1fEkDezHUdgdTEpJcjcGWaR4UhfSVL" , "3rUQID2iHlFZot7A5tbEsNix7KakmcMx" );HttpProfile ();SetEndpoint ("ocr.tencentcloudapi.com" );ClientProfile ();SetHttpProfile (httpProfile);OcrClient (cred, "ap-guangzhou" , clientProfile);RecognizeTableOCRRequest ();"./images/1.jpg" ;ifstream in (image_path, ios::in | ios::binary) ;rdbuf ();str ();base64_encode (reinterpret_cast <const unsigned char *>(image_binary.data ()), image_binary.size ());SetImageBase64 (image_base64);auto outcome = client.RecognizeTableOCR (req);if (!outcome.IsSuccess ())GetError ().PrintAll () << endl;return -1 ;GetResult ();ToJsonString () << endl;return 0 ;
具体案例 您可以从以下仓库中下载示例代码:https://github.com/ShengjieJin/tencentcloudOCRDemo
路径:/Demo/3 C++ Demo 中提供了可直接运行的程序。
配置好相关环境后,将main.cpp第71行中的 "SecretId", "SecretKey" 替换为您自己的凭证。
1 Credential cred = Credential ("SecretId" , "SecretKey" );
执行以下命令编译并运行程序:
1 2 3 g++ -o main main.cpp -I/usr/local/include/tencentcloud/ocr/v20181119 -L/usr/local/lib -ltencentcloud-sdk-cpp-core -ltencentcloud-sdk-cpp-ocr
程序运行后,变量 resp 中将保存 API 返回的 JSON 格式字符串。下面是打印内容的示例:
Node.js调用OCR API 步骤1:环境配置
安装 Node.js 环境。您可以在 Node.js 官网 下载安装包并进行安装。
通过npm安装Tencent Cloud SDK:
1 npm install tencentcloud-sdk-nodejs --save
步骤2:身份认证 在您的代码中,您需要设置以下配置:
1 2 3 4 5 6 7 8 9 10 11 12 13 14 15 16 17 18 19 const tencentcloud = require ("tencentcloud-sdk-nodejs" );const OcrClient = tencentcloud.ocr .v20181119 .Client ;const clientConfig = {credential : {secretId : "yourSecretId" ,secretKey : "yourSecretKey" ,region : "ap-guangzhou" , profile : {httpProfile : {endpoint : "ocr.tencentcloudapi.com" ,const client = new OcrClient (clientConfig);
在以上代码中,您需要将yourSecretId和yourSecretKey替换为您的实际API密钥信息。并且,您需要设置region为您需要请求的地域信息。profile部分设置了API请求的基础信息。
步骤3:base64编码 在使用OCR API时,您需要将您的图片文件编码为base64格式。您可以使用以下代码将图片文件编码为base64格式:
1 2 3 4 5 6 7 8 9 10 const imagePath = path.join (__dirname, "images" , "1.jpg" );let imageBase64;try {readFileSync (imagePath, "base64" );catch (err) {console .error (`Failed to read image file: ${err.message} ` );return ;
在以上代码中,您需要将imagePath替换为您的图片文件的实际路径。如果读取图片文件失败,您需要捕获错误并处理。
步骤4:调用API 在设置完请求参数之后,您可以使用以下代码调用OCR API:
javascript
1 2 3 4 5 6 7 8 9 10 11 12 const params = {ImageBase64 : imageBase64, RecognizeTableOCR (params)then ((data ) => {console .log (data);catch ((err ) => {console .error (`OCR request failed: ${err.message} ` );
在以上代码中,params对象中设置了API请求的参数信息。client.RecognizeTableOCR(params)部分是调用OCR API的实际代码。
完整示例 以下是一个完整的示例,演示了如何使用 Node.js 调用腾讯云的 OCR 服务来识别表格,并打印出识别结果。
1 2 3 4 5 6 7 8 9 10 11 12 13 14 15 16 17 18 19 20 21 22 23 24 25 26 27 28 29 30 31 32 33 34 35 36 37 38 39 40 41 42 43 44 45 46 47 48 49 const tencentcloud = require ("tencentcloud-sdk-nodejs" );const path = require ("path" );const fs = require ("fs" );const OcrClient = tencentcloud.ocr .v20181119 .Client ;const clientConfig = {credential : {secretId : "yourSecretId" ,secretKey : "yourSecretKey" ,region : "ap-guangzhou" , profile : {httpProfile : {endpoint : "ocr.tencentcloudapi.com" ,const imagePath = path.join (__dirname, "images" , "1.jpg" );const client = new OcrClient (clientConfig);let imageBase64;try {readFileSync (imagePath, "base64" );catch (err) {console .error (`Failed to read image file: ${err.message} ` );return ;const params = {ImageBase64 : imageBase64, RecognizeTableOCR (params)then ((data ) => {console .log (data);catch ((err ) => {console .error (`OCR request failed: ${err.message} ` );
具体案例 您可以从以下仓库中下载示例代码:https://github.com/ShengjieJin/tencentcloudOCRDemo
在这里,我们提供两个不同版本的示例,它们都可以直接运行:
基础版本 :它读取了位于 ./images/1.jpg 路径下的图片,并将识别结果直接打印在控制台窗口上。进阶版本 :该版本提供了前后端交互的示例,它可以将识别结果打印在网页上。
基础版本 路径:/Demo/4 Node.js Demo/basic version
在该文件夹下,点击在终端中打开
输入以下命令以安装必要的依赖:
1 npm install tencentcloud-sdk-nodejs --save
将 server.js 第 11 行、12 行中的 yourSecretId 和 yourSecretKey 替换为您自己的凭证。
1 2 3 4 credential : {secretId : "yourSecretId" ,secretKey : "yourSecretKey" ,
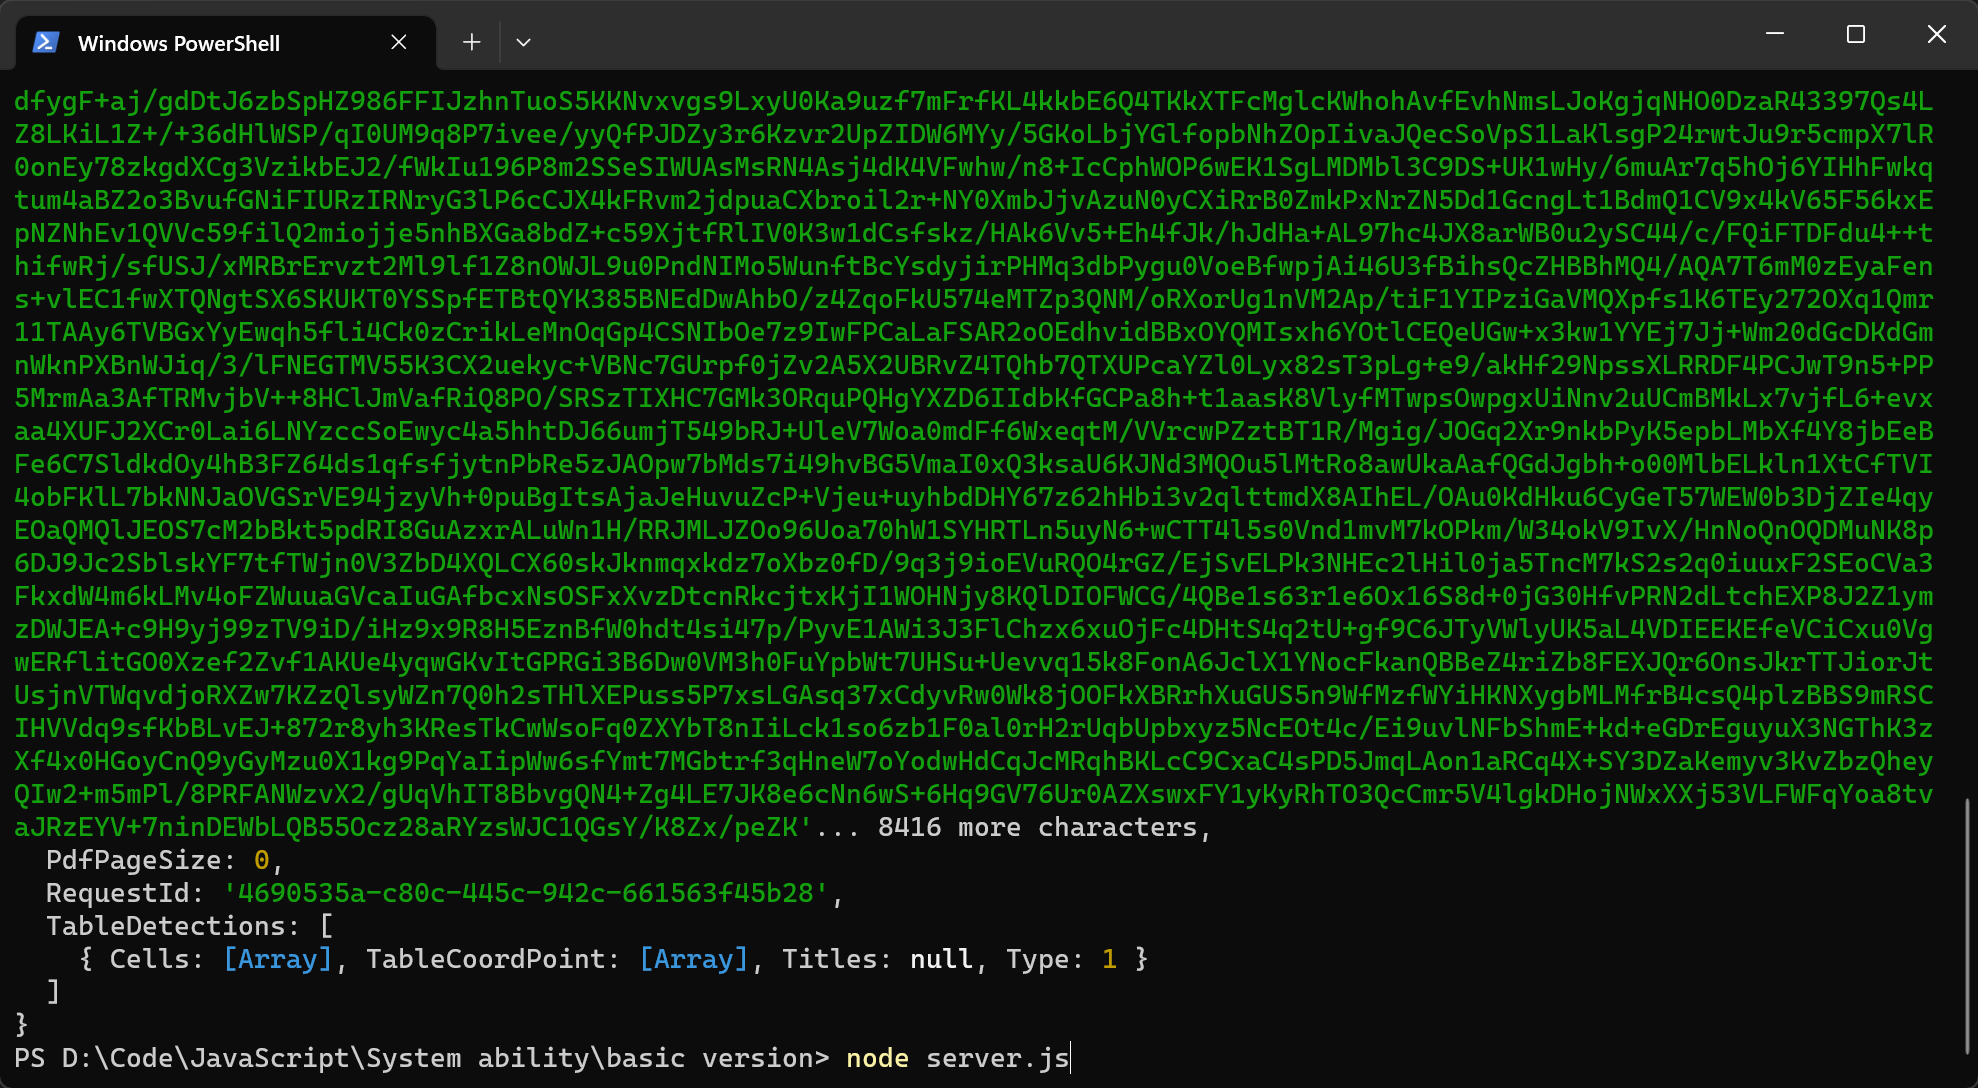
输入以下命令运行脚本:
输出结果如下:
输出参数参考腾讯云 API Explorer
进阶版本 路径:/Demo/4 Node.js Demo/advanced version
在该文件夹下,点击在终端中打开
输入以下命令配置好相关环境
1 2 3 npm install tencentcloud-sdk-nodejs --save
将server.js第23行、24行中的 yourSecretId和yourSecretKey 替换为您自己的凭证。
1 2 3 4 credential : {secretId : "yourSecretId" ,secretKey : "yourSecretKey" ,
输入以下命令运行脚本
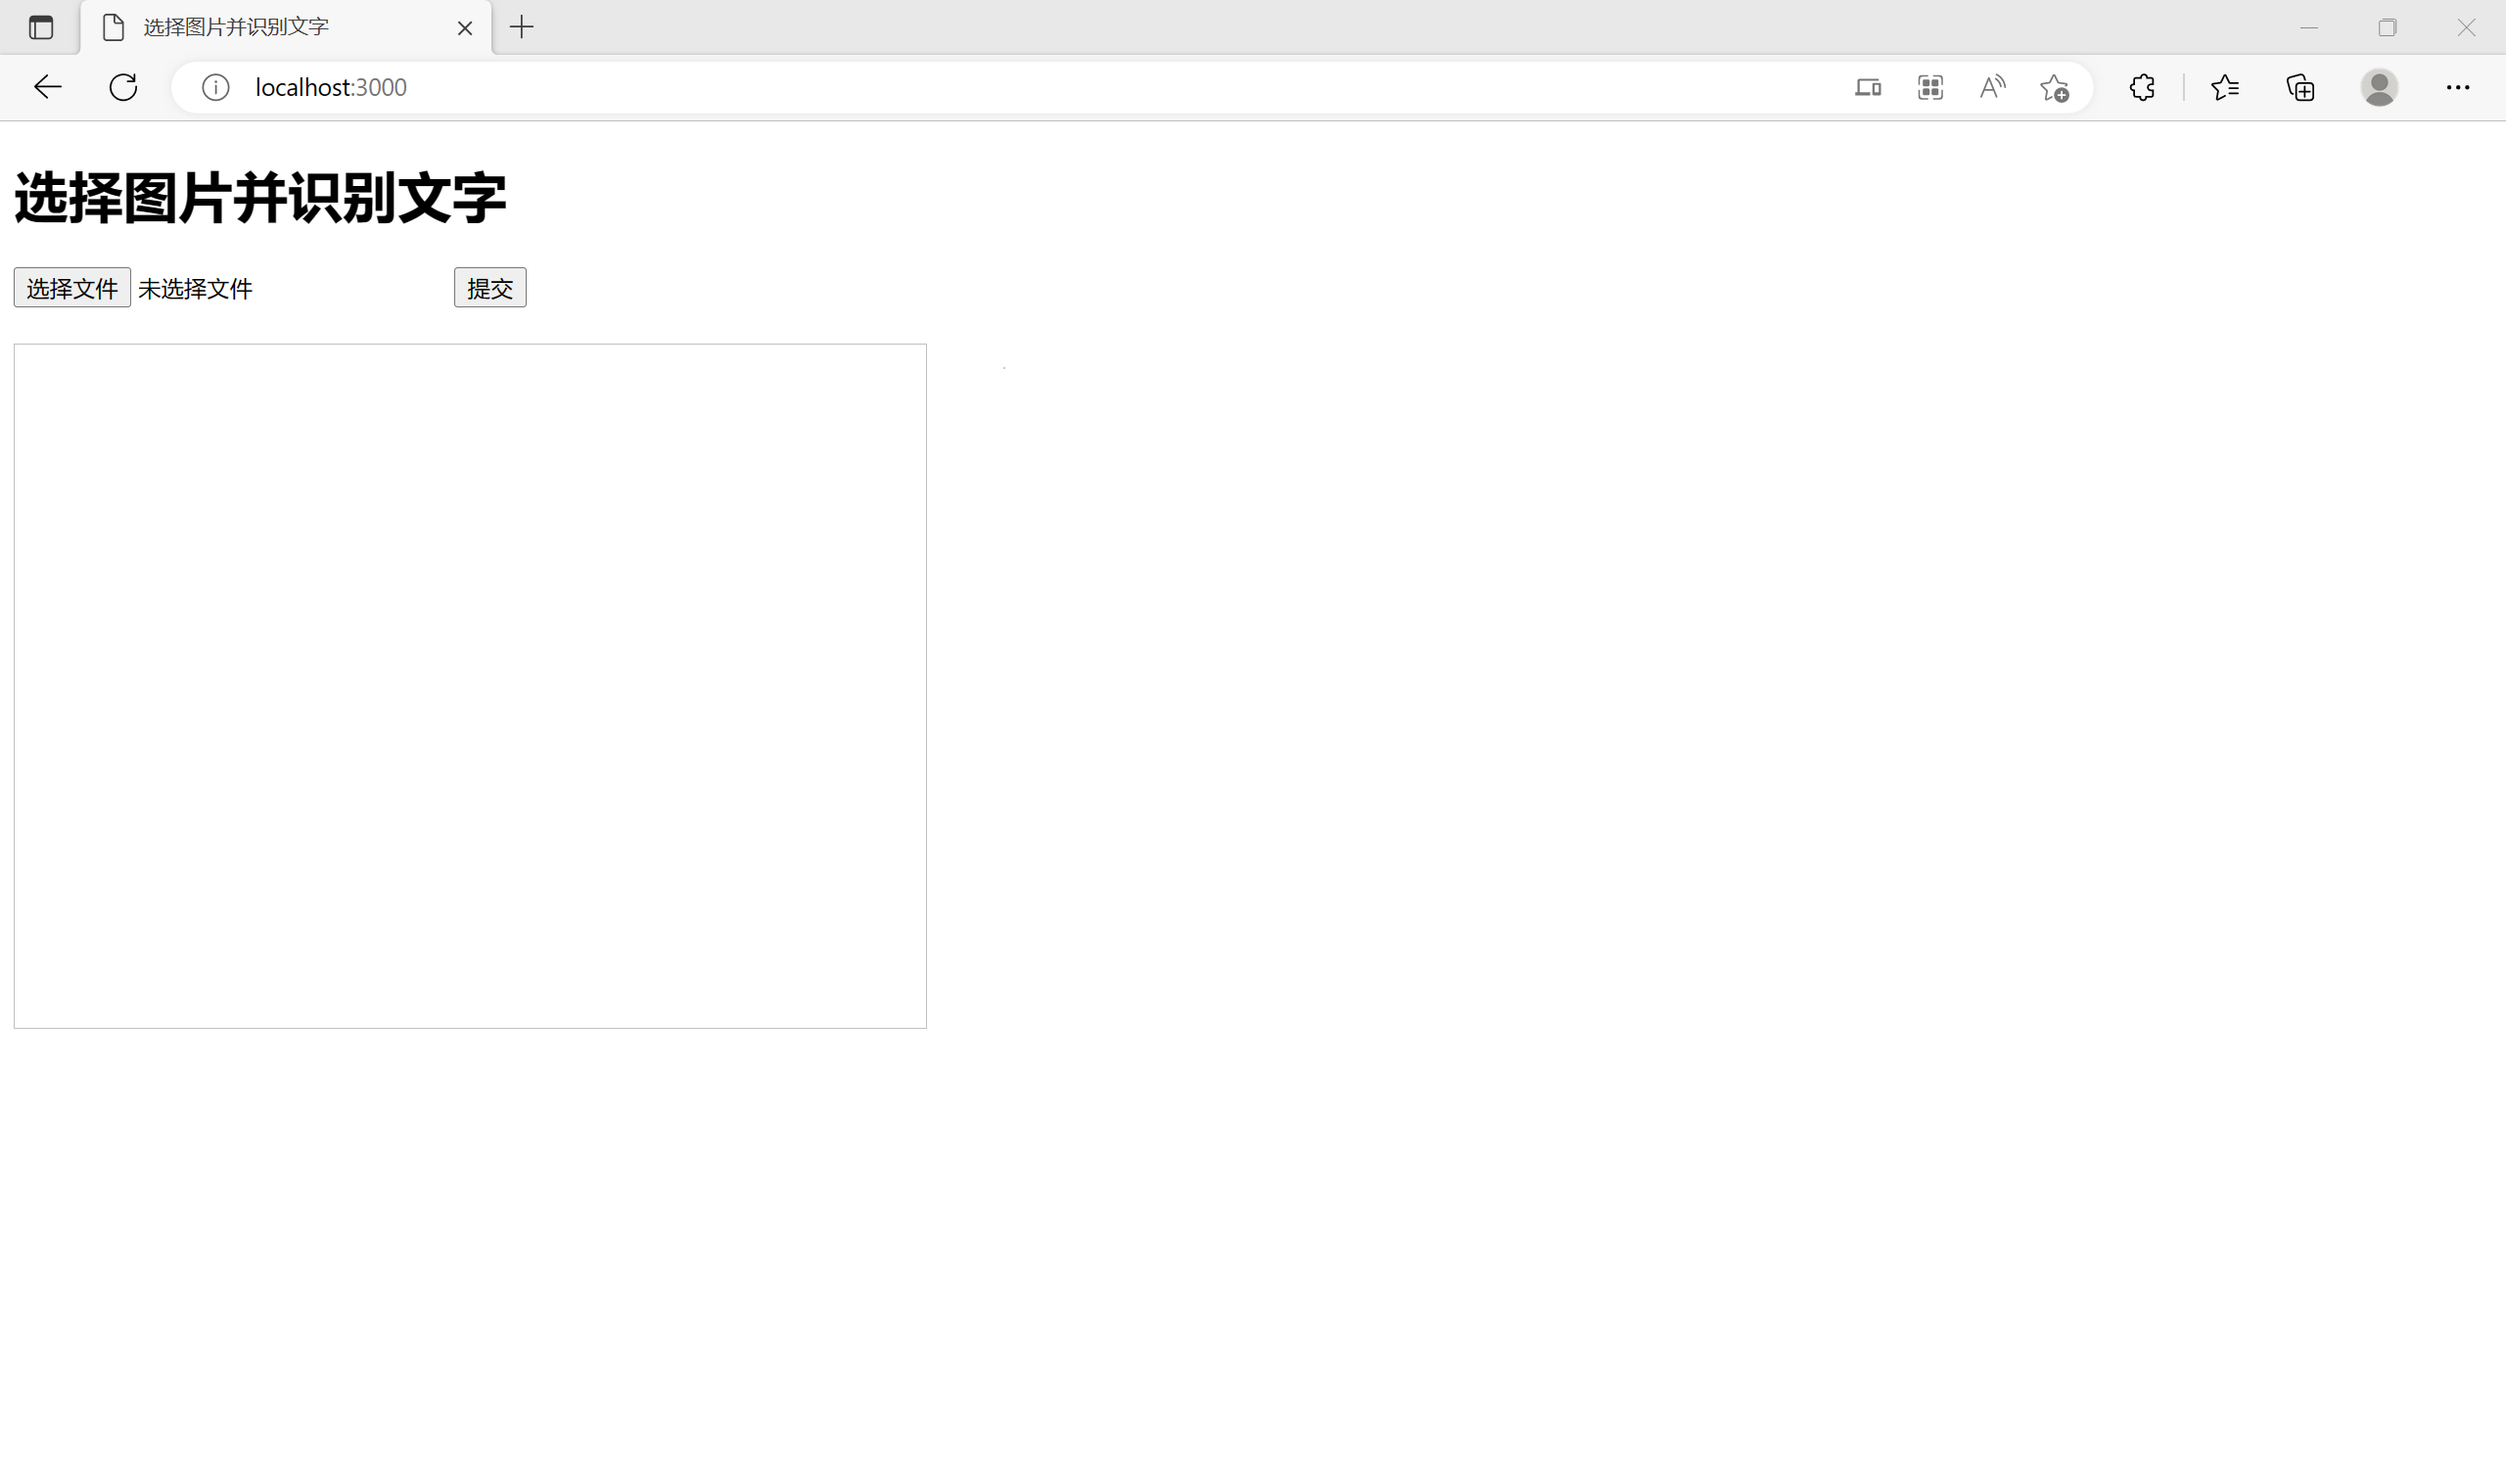
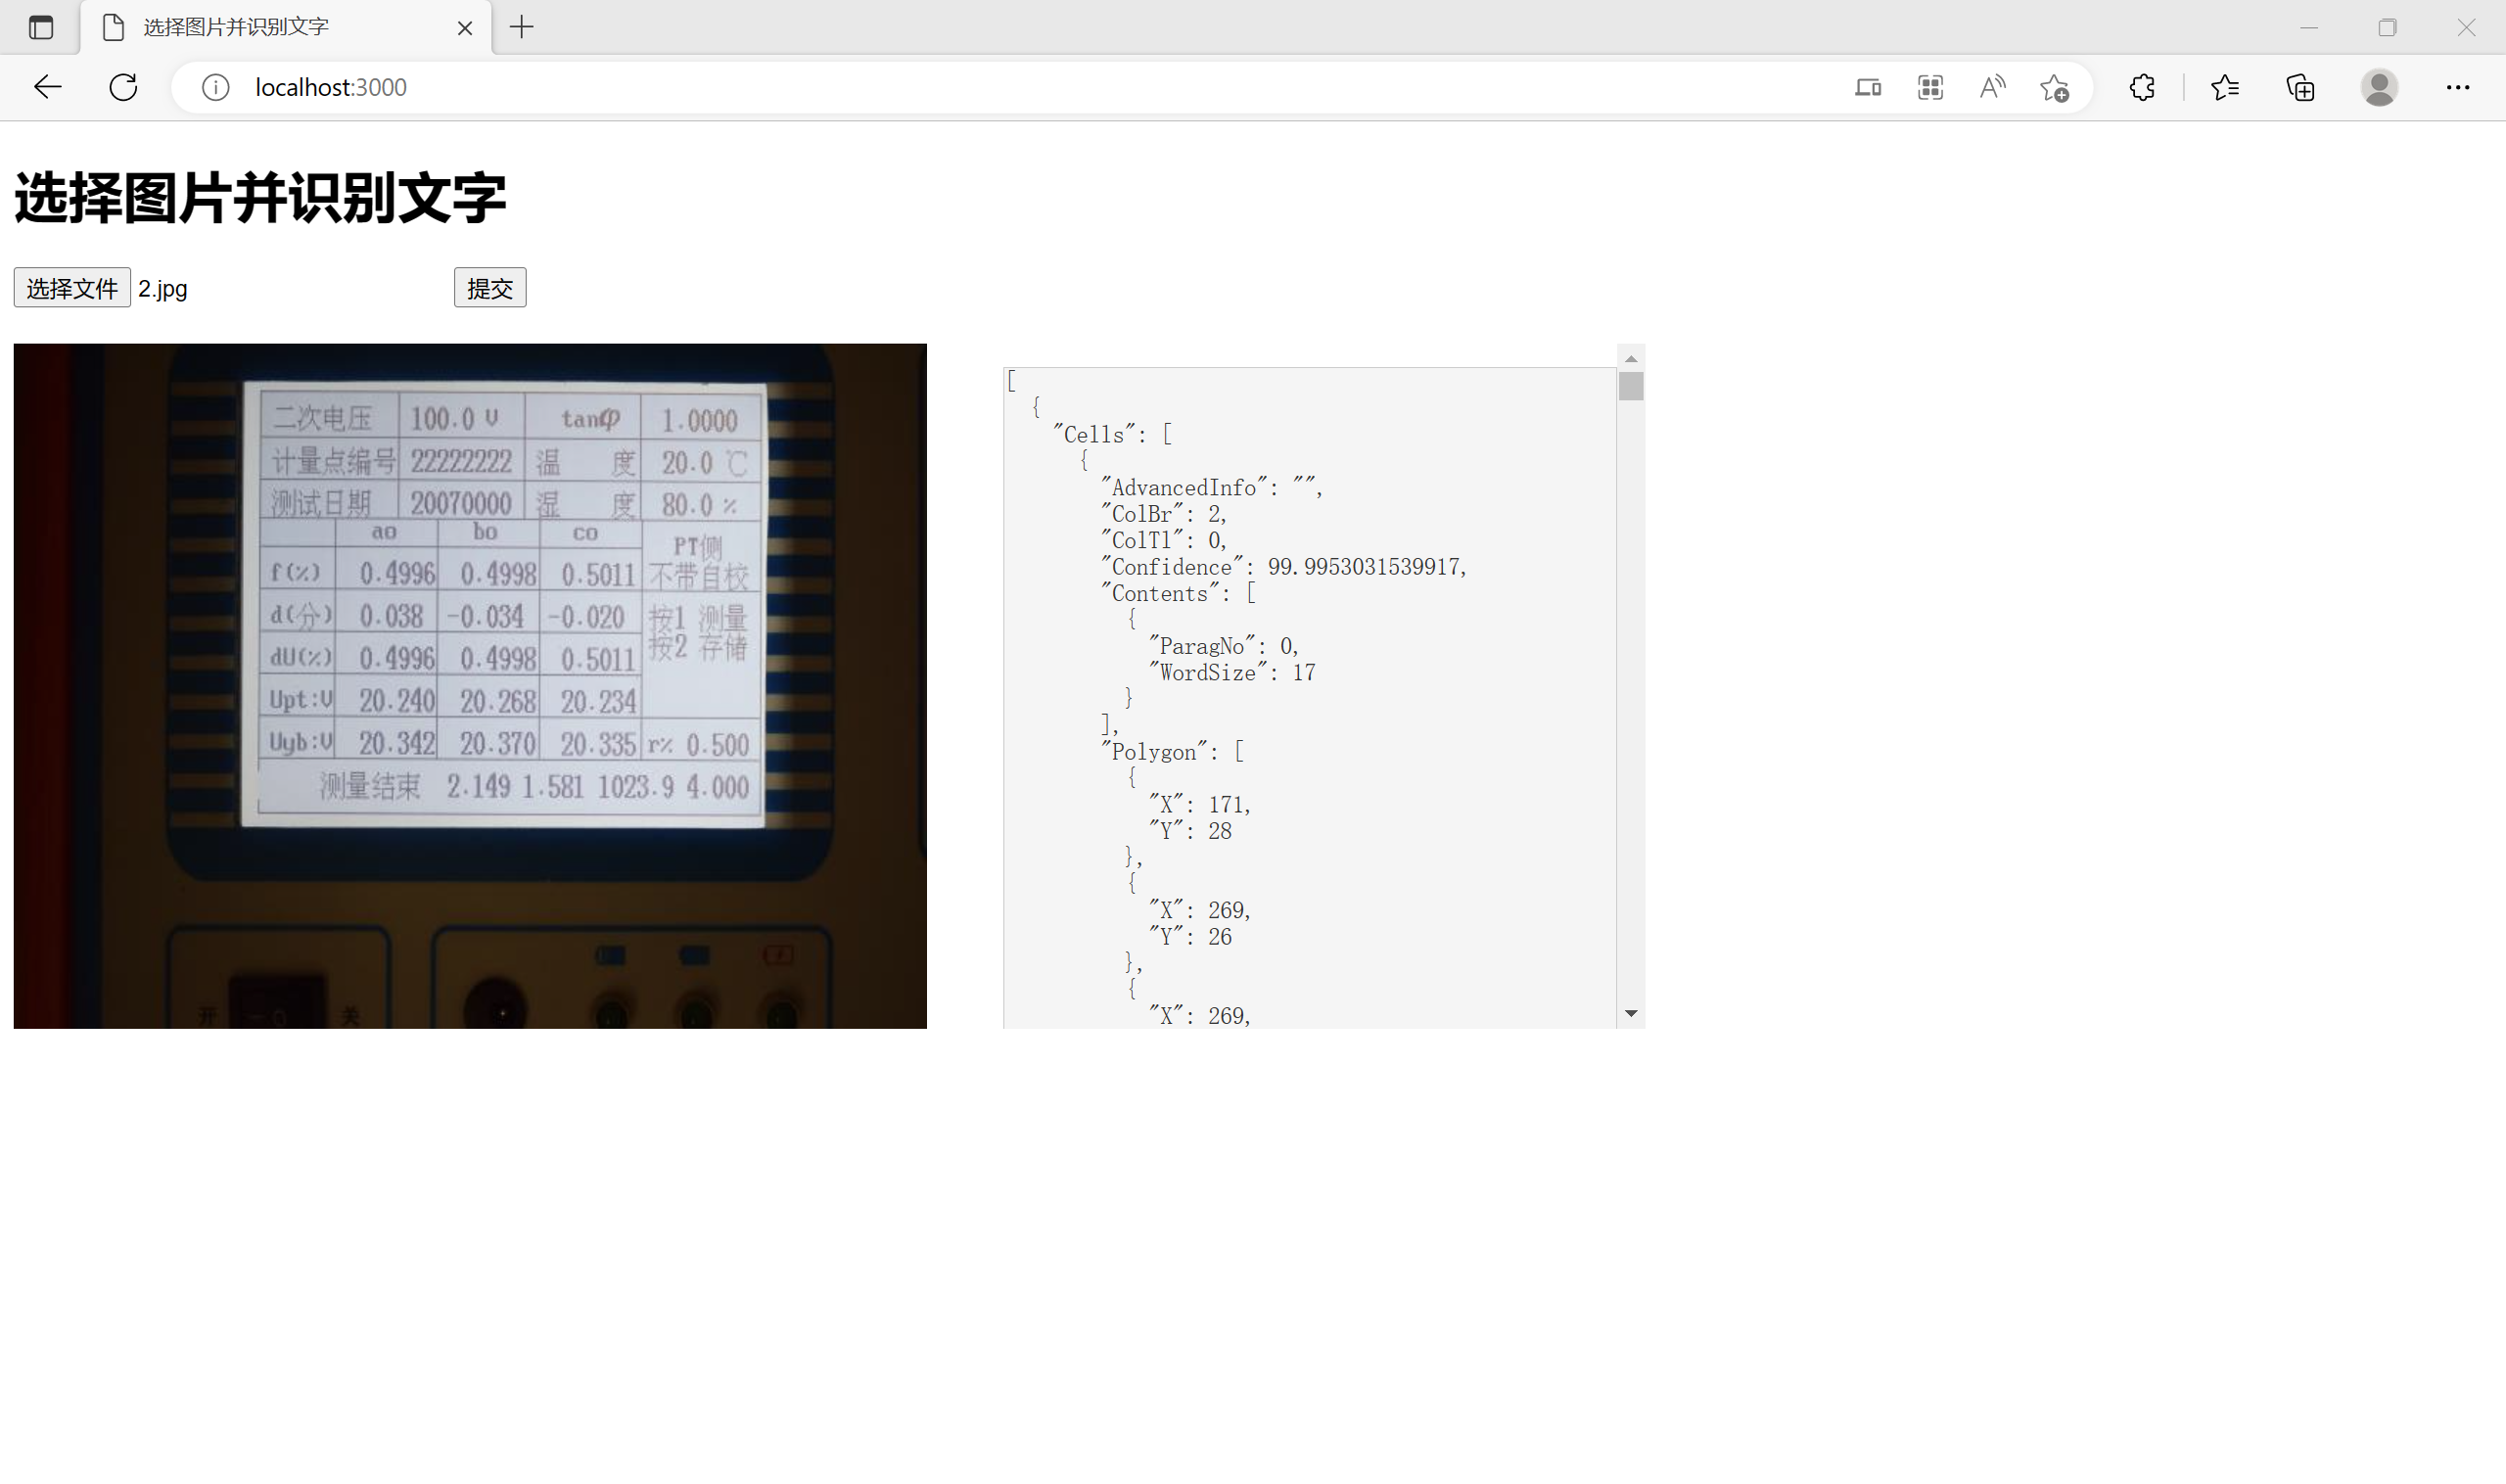
打开浏览器,输入http://localhost:3000/
选择需要识别的表格图片,并点击提交,识别结果展示如下:
Python调用OCR API 步骤1:环境配置
Python 3.6至3.9版本。
通过 Pip 安装 Tencent Cloud SDK:
1 pip install -i https://mirrors.tencent.com/pypi/simple/ --upgrade tencentcloud-sdk-python
步骤2:身份认证 在此步骤中,我们将配置身份认证凭证。请确保已获取您的腾讯云 API 密钥。
1 2 3 4 5 6 7 8 9 10 11 import jsonimport base64from PIL import Imagefrom io import BytesIOfrom tencentcloud.common import credentialfrom tencentcloud.common.profile.client_profile import ClientProfilefrom tencentcloud.common.profile.http_profile import HttpProfilefrom tencentcloud.common.exception.tencent_cloud_sdk_exception import TencentCloudSDKExceptionfrom tencentcloud.ocr.v20181119 import ocr_client, models"SecretId" , "SecretKey" )
步骤3:base64编码 在此步骤中,我们示范了如何将一张jpg格式图片编码为api需要的base64格式.图片为本地读入,请您在具体调用时根据需求进行修改。
1 2 3 4 5 6 7 8 9 10 11 with open ("./images/1.jpg" , "rb" ) as image_file:open (image_file)format ='JPEG' )'utf-8' )
步骤4:调用 API 在此步骤中,我们将使用 cred 对象调用腾讯云 OCR API的 RecognizeTableOCR API进行表格识别,并将响应保存到变量resp中。
1 2 3 4 5 6 7 8 9 10 11 12 13 14 15 16 17 18 19 20 21 22 23 24 25 26 27 try :"ocr.tencentcloudapi.com" "ap-guangzhou" , clientProfile)"ImageBase64" : img_base64, print (resp.to_json_string())except TencentCloudSDKException as err:print (err)
完整示例 以下是一个完整的示例,演示了如何使用 Python 调用腾讯云的 OCR 服务来识别表格,并打印出识别结果。
1 2 3 4 5 6 7 8 9 10 11 12 13 14 15 16 17 18 19 20 21 22 23 24 25 26 27 28 29 30 31 32 33 34 35 36 37 38 39 40 41 42 43 44 45 46 47 48 49 50 51 52 import jsonimport base64from PIL import Imagefrom io import BytesIOfrom tencentcloud.common import credentialfrom tencentcloud.common.profile.client_profile import ClientProfilefrom tencentcloud.common.profile.http_profile import HttpProfilefrom tencentcloud.common.exception.tencent_cloud_sdk_exception import TencentCloudSDKExceptionfrom tencentcloud.ocr.v20181119 import ocr_client, modelswith open ("./images/1.jpg" , "rb" ) as image_file:open (image_file)format ='JPEG' )'utf-8' )try :"SecretId" , "SecretKey" )"ocr.tencentcloudapi.com" "ap-guangzhou" , clientProfile)"ImageBase64" : img_base64, print (resp.to_json_string())except TencentCloudSDKException as err:print (err)
具体案例 您可以从以下仓库中下载示例代码:https://github.com/ShengjieJin/tencentcloudOCRDemo
路径:/Demo/5 Python Demo 中提供了可直接运行的程序。
配置好相关环境后,将main.py第25行中的 Credential("SecretId", "SecretKey") 替换为您自己的凭证。然后运行程序。
1 cred = credential.Credential("SecretId" , "SecretKey" )
注意:关闭VPN!!!
程序运行后,变量 resp 中将保存 API 返回的 JSON 格式字符串。下面是打印内容的示例:
GO调用OCR API 步骤1:环境配置
Go 1.9 版本及以上
初始化一个名叫ocr的模块:
腾讯云镜像加速go get下载(可选 ):
Linux 或 MacOS:
1 export GOPROXY=https://mirrors.tencent.com/go/
Windows:
1 set GOPROXY=https://mirrors.tencent.com/go/
安装公共基础包:
1 go get -v -u github.com/tencentcloud/tencentcloud-sdk-go/tencentcloud/common
安装ocr产品包:
1 go get -v -u github.com/tencentcloud/tencentcloud-sdk-go/tencentcloud/ocr
步骤2:身份认证 使用该API之前,您需要拥有一对腾讯云账号的 SecretId 和 SecretKey 用于身份认证。在代码中,可以通过以下代码实例化一个认证对象:
1 2 3 4 credential := common.NewCredential("SecretId" ,"SecretKey" ,
请将 “SecretId” 和 “SecretKey” 替换为您自己的账号信息。
步骤3:base64编码 在使用该API之前,您需要将待识别的图片文件转换成base64格式。在示例中,通过以下代码读取本地图片文件,并进行base64编码:
1 2 3 4 5 fileData, err := ioutil.ReadFile("./images/1.jpg" )if err != nil {panic (err)
步骤4:调用 API 通过以下代码实例化一个client对象和一个请求对象,并将图片内容设置为请求对象的参数:
1 2 3 4 5 6 7 8 9 10 11 12 13 14 15 16 17 18 19 cpf := profile.NewClientProfile()"ocr.tencentcloudapi.com" "ap-guangzhou" , cpf)if err != nil {panic (err)if _, ok := err.(*errors.TencentCloudSDKError); ok {"An API error has returned: %s" , err)return if err != nil {panic (err)
完整示例 以下是一个完整的示例,演示了如何使用 GO 调用腾讯云的 OCR 服务来识别表格,并打印出识别结果。
1 2 3 4 5 6 7 8 9 10 11 12 13 14 15 16 17 18 19 20 21 22 23 24 25 26 27 28 29 30 31 32 33 34 35 36 37 38 39 40 41 42 43 44 45 46 47 48 49 50 51 52 53 54 55 56 57 package mainimport ("encoding/base64" "fmt" "io/ioutil" "github.com/tencentcloud/tencentcloud-sdk-go/tencentcloud/common" "github.com/tencentcloud/tencentcloud-sdk-go/tencentcloud/common/errors" "github.com/tencentcloud/tencentcloud-sdk-go/tencentcloud/common/profile" "github.com/tencentcloud/tencentcloud-sdk-go/tencentcloud/ocr/v20181119" func main () "./images/1.jpg" )if err != nil {panic (err)"SecretId" ,"SecretKey" ,"ocr.tencentcloudapi.com" "ap-guangzhou" , cpf)if err != nil {panic (err)if _, ok := err.(*errors.TencentCloudSDKError); ok {"An API error has returned: %s" , err)return if err != nil {panic (err)"%s" , response.ToJsonString())
具体案例 您可以从以下仓库中下载示例代码:https://github.com/ShengjieJin/tencentcloudOCRDemo
路径:/Demo/6 GO Demo 中提供了可直接运行的程序。
配置好相关环境后,将main.go第25、26行中的 "SecretId","SecretKey" 替换为您自己的凭证。
1 2 3 4 credential := common.NewCredential ("SecretId" ,"SecretKey" ,
执行以下命令运行程序:
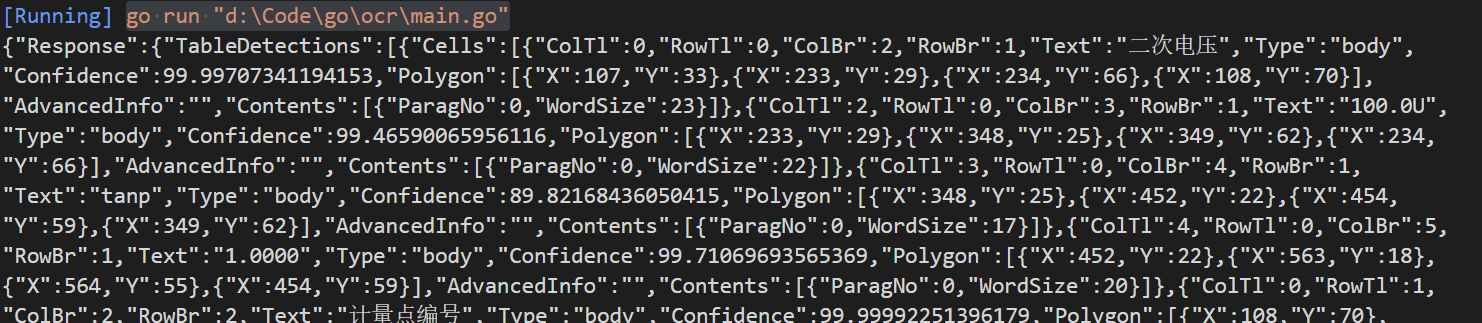
程序运行后,变量 response 中将保存 API 返回的 JSON 格式字符串。下面是打印内容的示例: